This week, I am catching up on my 2016 Keeping Track Of Life album or KTOL for short. I took a look at my album last week and realized I have so much work to do. Keeping Track of Life is an in-person class taught by my friend, Krista at my local store, The Paperie. The class is similar to Project Life except it's a month-at-a-glace approach to scrapbooking with a layout added for fun instead of a week-by-week approach.
In February, I missed class due to a snowstorm. Although Krista's instructions are included in the class, I decided to take the opportunity to add a mixed media layout to my album. Here it is!
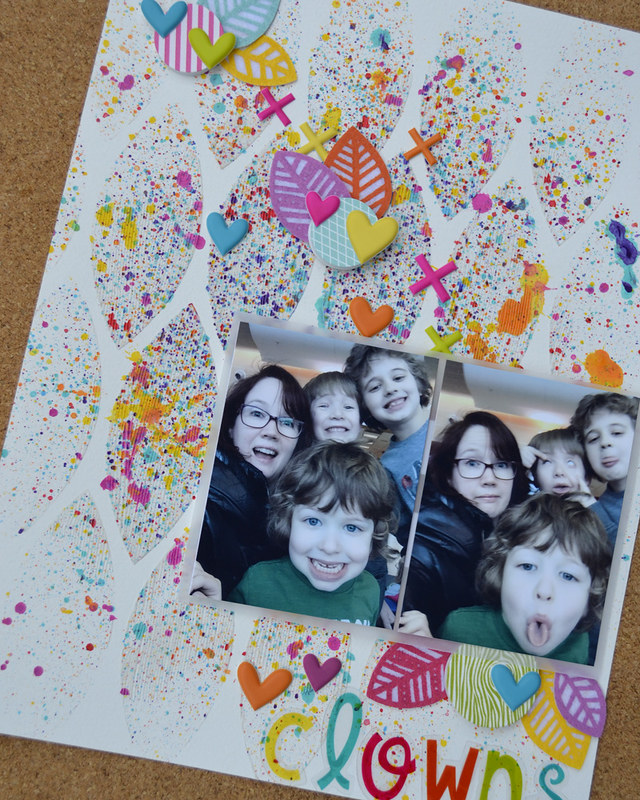
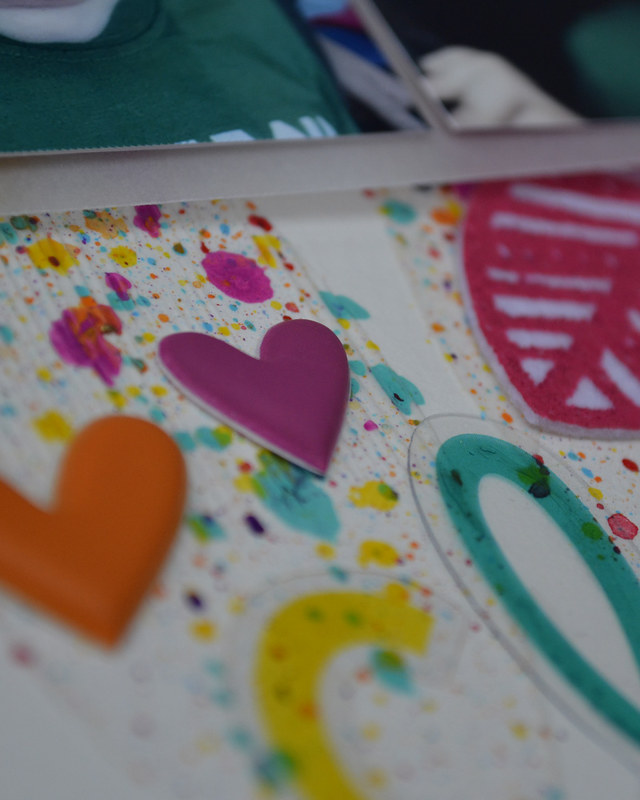
I made this background using the Tim Holtz Splatter Brush. I used it in a class I taught a few months ago and fell in love with it. It makes the most amazing splatters and is so easy to clean but I'm excited to show you how it makes the most amazing marks in wet medium.
So, let's get started with the supply list and the instructions for this week's layout.
Here are the supplies I used to make this week's layout.
Heavy Gesso - Art Basics (Prima)
Watercolor Paper (Canson)
Modeling Paste - Art Basics (Prima)
Stencil: Blazonry TCW280 - Balzer Designs (The Crafter's Workshop)
Palette Knife
Splatter Brush - Tim Holtz Distress (Ranger)
Heavy Body Paint - Dina Wakley Media (Ranger)
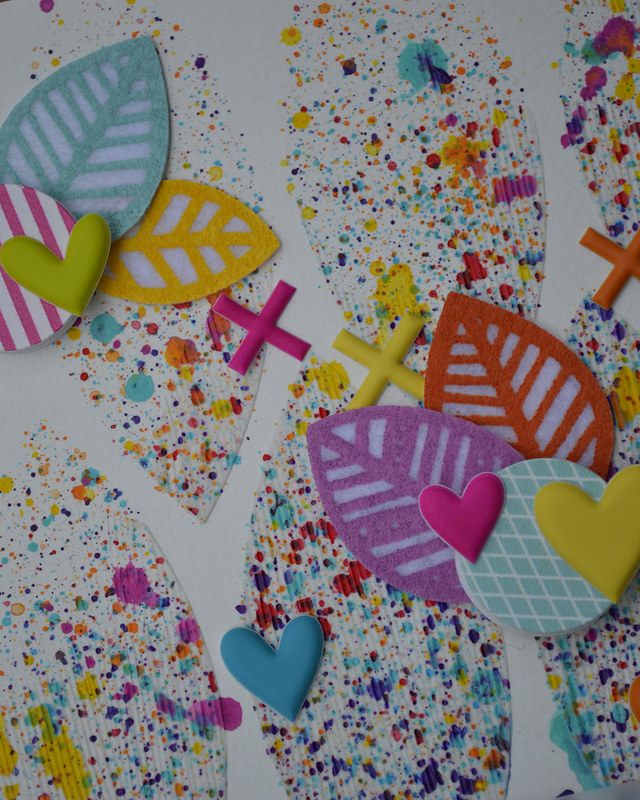
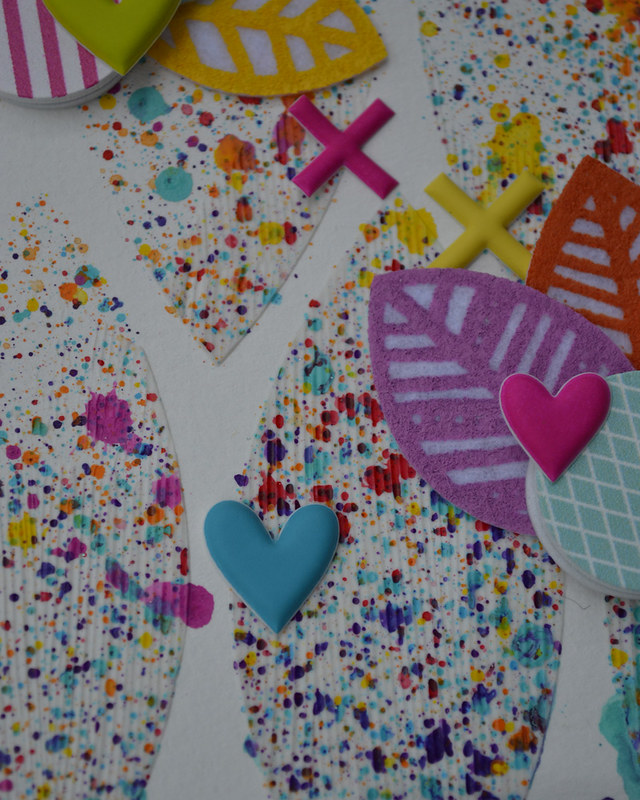
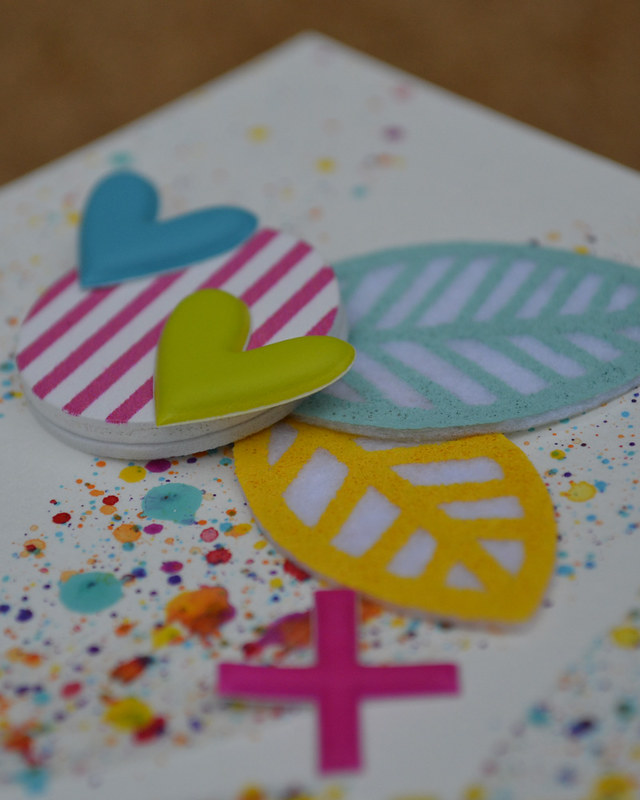
Embellishment Kit - February (Freckled Fawn)
Felt Leaves (Freckled Fawn)
Vellum
Instructions:
1. Apply a thin coat of gesso to the watercolor paper. This is always the first step of my process if I'm using acrylic paint or spray ink. A coat of gesso makes watercolor paper non-porous and that means that paint doesn't soak into the paper so I can remove mistakes with a wet baby wipe - sometimes. A thin coat doesn't take long to dry so I usually set mine aside but you can also dry with a heat gun.
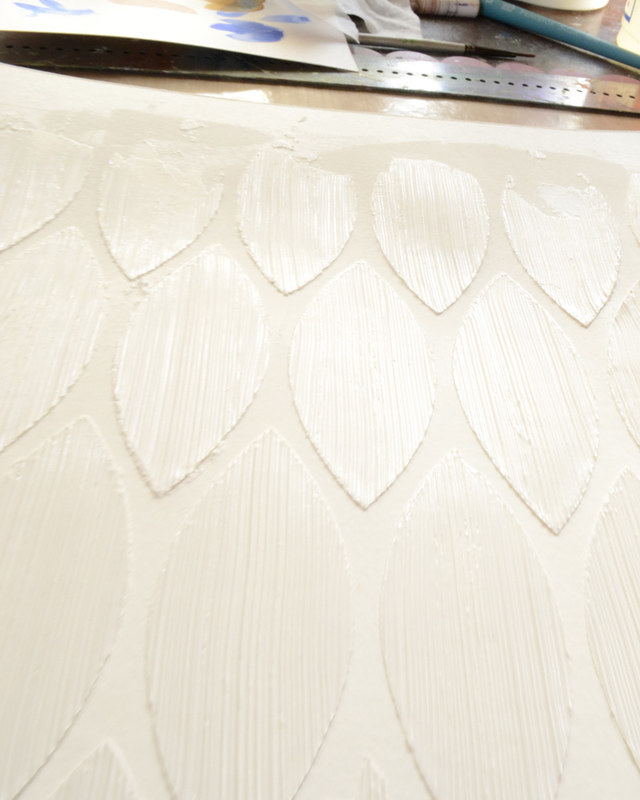
2. Apply a thin coat of modeling paste through a stencil. I love dimension so I use modeling paste in a lot of my layouts. Modeling paste holds marks really well which is perfect for the next step.
3. Drag the Splatter Brush through the modeling paste. The Splatter Brush isn't only for splatters...
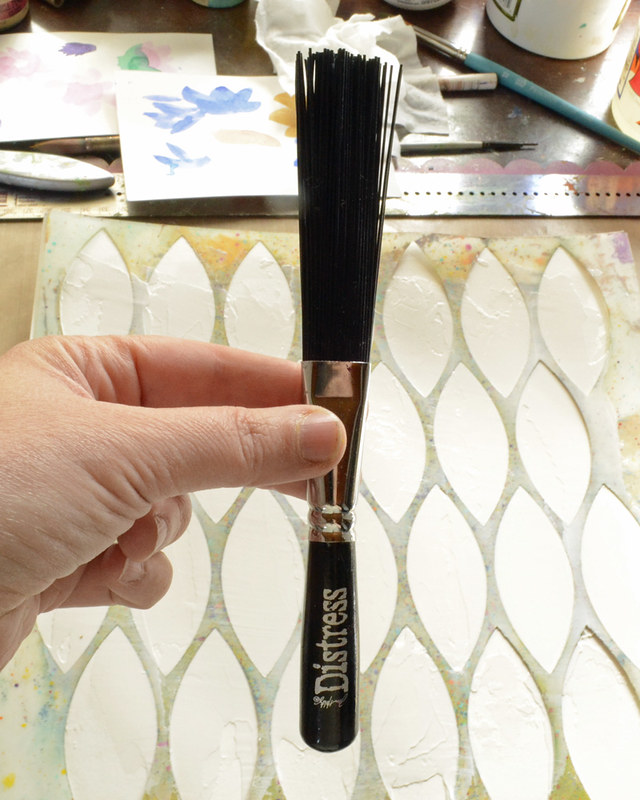
If you lightly drag it through modeling paste, it makes the most amazing marks.
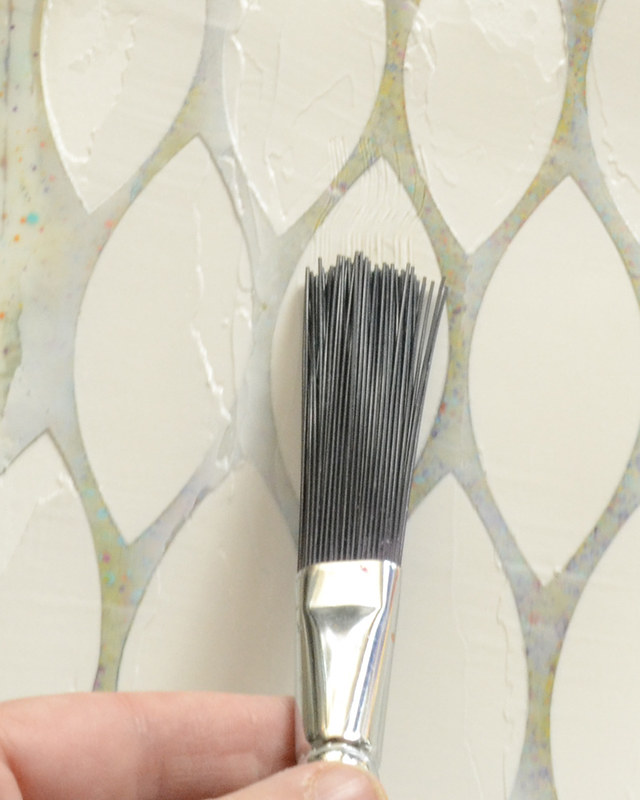
Leave your stencil in place to act as a mask.
When you're finished and have covered the whole background. Remove stencil and set the background aside to dry.
Important tip: Clean stencil and Splatter Brush immediately using baby wipes. When modeling paste dries, it is almost impossible to remove from stencils without a lot of hard work. I always clean up immediately after using modeling paste.
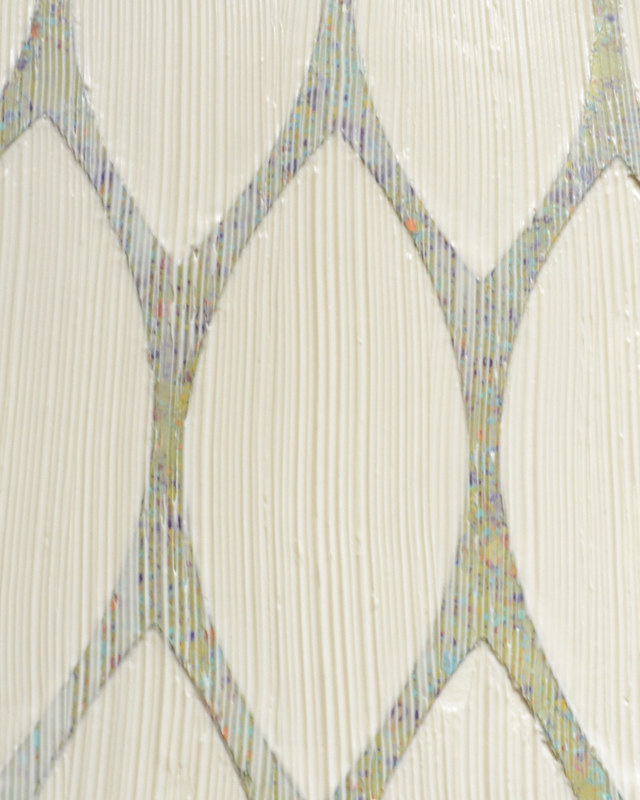
Here's what the background looked like after everything was dry and ready for the next step.
4. Replace stencil on dry background. Line up the stencil with the original pattern you made in modeling paste. I used a little washi tape to hold it in place so my hands were free for the next step.
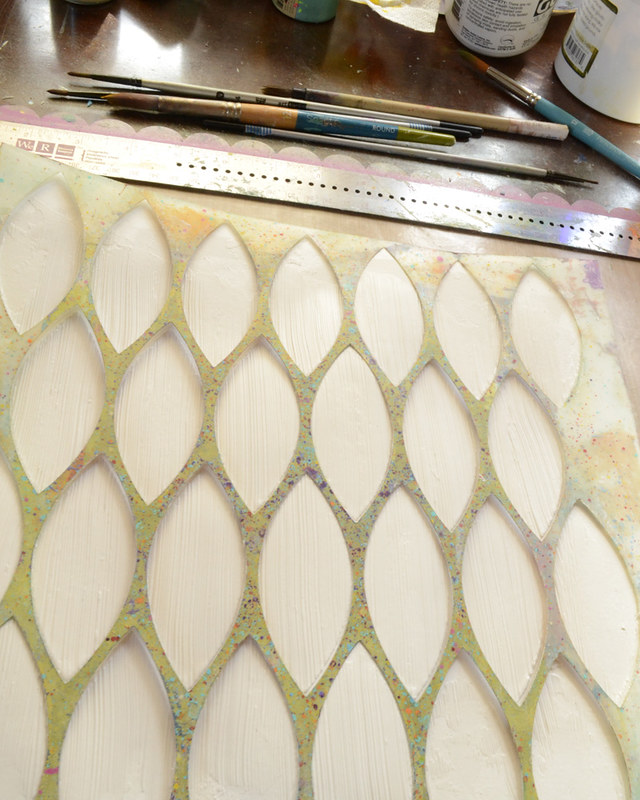
5. Apply paint with Splatter Brush. I used a few spritzes from my water bottle to water down the heavy body paint to a milk-like consistency. Then I swiped the brush through paint and splattered the paint on my background with the stencil in place.
Here's a great video tutorial Tim Holtz made that shows you how to make splatters using the Splatter Brush. He features the brush at the 4-minute mark.
Tip: The more water you add the bigger the splatters.
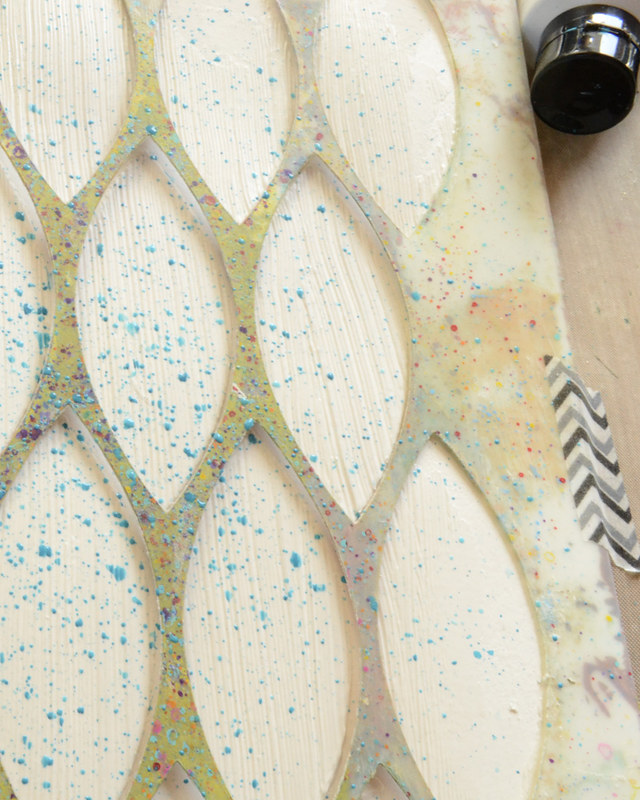
The stencil acts as a mask and you get something that looks like this. If you look closely, you can see that the ridges creating by the Splatter Brush catch the paint and keep it from dripping.
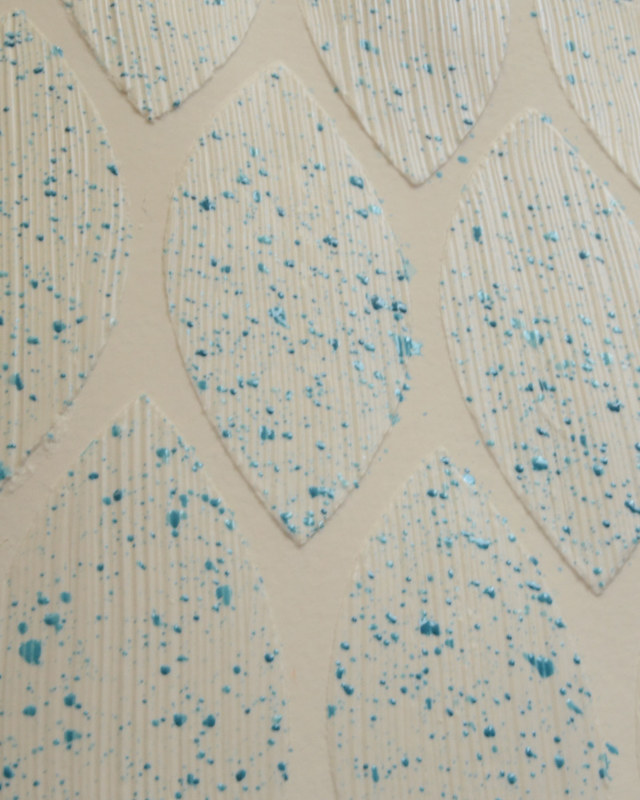
Add as many colours of paint as you like to create a multi-color backgound. I used all the colors of Dina Wakley paint that I had in my stash. Some of the colors bled under the stencil because the paint was very watery but I like the effect.

6. Embellish. I used the February Freckled Fawn embellishment kit for this layout. The colors of the puffy hearts, acrylic letters and painted wood buttons went perfectly with my bright, colorful background and silly photos.

This technique is so fun and easy, I hope you consider giving it a try. The Tim Holtz Splatter Brush is definitely a tool that I am so happy to have because it it helps me use all my stencils and inks and paints in a new way. I love it when that happens.
Please feel free to leave a note in the comments and say "hi". It's always lovely to meet the people who stop by my blog. And if you have any questions about products or techniques used, please leave a note and I'll get back to you. I am happy to help.
Thanks for stopping by!
Cathie
No comments:
Post a Comment